Webcams
A lot of scientific and industrial equipment uses small video and digital cameras to look at things so a computer can analyze or measure something. These are called machine vision cameras, and they are sometimes nothing more than good quality cameras without viewfinders and other human conveniences. These cameras are commonly used in telecines as well, but they are expensive – the cheapest ones start at around $300 and they go up quickly into the $1000’s.
Webcams are the poor man’s machine vision cameras. They are small and simple, yet include a computer interface (usually USB) and have lots of software support. It’s fair to say that the major challenge of this project has been to squeeze the most out of a very cheap camera!
I started with a Logitech Quickcam Communicate Deluxe. It has a 1.3 MP CMOS imager that provides very nice images when used as a live video or snapshot camera (e.g. when used as a webcam). But the CMOS imager is a little short on dynamic range for film scanning (see Dynamic Range article below). The CMOS image sensor is noisy, and the Logitech processing includes a denoising algorithm that mangles the detail in the shadows.
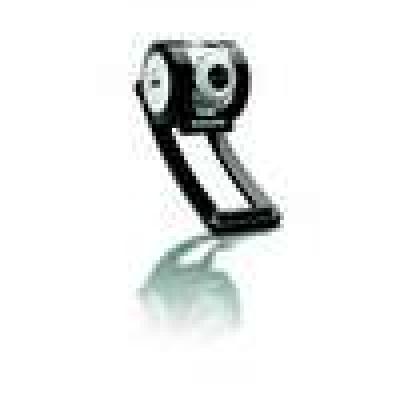 So I did some more searching and found the Philips SPC900NC webcam. It’s a discontinued model, but it has a Sony CCD in it, and is very popular with amateur astronomers so there is a lot of info on the web about modifying it. This camera produced a noticeably better image than the Logitech. There is still noise in the shadows, but it’s very random and the image doesn’t display the artifacts of aggressive noise processing. The camera has a bit more dynamic range (probably actually 1 bit more), and provides a gamma adjustment that is very helpful for telecine. These cameras are still sometimes available on Amazon and Ebay – mine was only $30. The earlier Philips ToUCam Pro 740, 750 and 840 used the same CCD and processor chip and are a suitable substitute.
To get a significant improvement in image quality would require a higher res machine camera which would cost about $600, so the cost of the machine would quadruple, but it might be worth it. There is room in the lamphouse for a little bigger camera, so it’s a possibility.
Here are samples from the two webcams I tried. The top image is from the Logitech, captured at its full 1280×960 resolution. The bottom image is from the Philips, also captured at its full resolution of 640×480. Click on the images to see them full size. The higher pixel resolution of the Logitech does not make up for its faults.
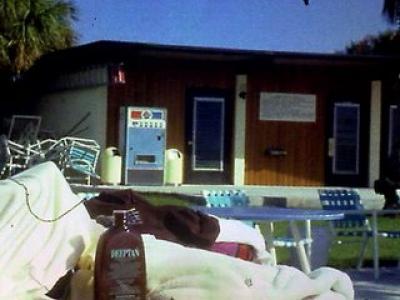
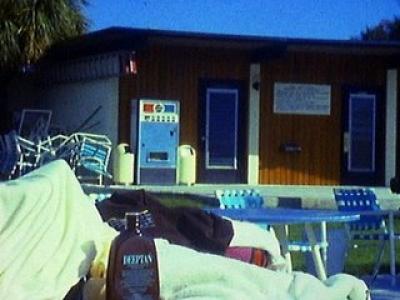
Here I adjusted the levels so you can see the shadow detail. Again, the Logitech sample is on top. It’s easy to see here that the lower resolution Sony CCD actually preserves more detail than the higher res CMOS imager. The CCD noise is random and resembles the grain of the film, so it looks better than the noise cleaning artifacts of the CMOS imager. Of course, the best of both worlds would be a 1280×960 CCD!
Like most webcams, the Philips offers a range of frame rates, from 5fps to 60fps. But these rates are not all created equal. The camera has only a USB1.1 interface, not the much faster USB2, so the data rate is pretty limited for streaming video. Above 5fps, the frames are compressed with increasing harm as the rate is increased. At 10fps and 15fps, the image shows severe 4×4 blocking, apparently from subsamping the color channels. At 20fps and higher, it looks like the camera only transmits a 320×240 image and the Windows driver upsamples to deliver 640×480 resolution, but the image is naturally very soft. So I am limited to 5fps to get good telecine quality.
Fortunately, with frame by frame transfer, the speed doesn’t matter. The playback speed is determined by the frame rate set in the AVI file, not the rate at which the capture is done, so the only penalty for slow running is that it takes longer to do the transfer. At 5 fps, a 400 foot reel takes about an hour and 45 minutes. That’s not too long to sit an watch, and of course, the scan is only done once per movie. But this is another reason why a machine vision camera is superior. Using a Firewire interface camera, it’s possible to run the movie faster than the normal 18fps viewing speed and still get high quality frame by frame transfers.


Thank you so much for the information. I have a ton of 8mm film and am looking forward to doing the transfer myself. Did you remove the lens from the webcam for use in this project? Thanks again.
Comment by Dan Sorahan — July 21, 2010 @ 2:53 pm
Yes, the lens is removed. The 17.5mm lens is the only lens in the path. The webcam lens is unscrewed from the threaded tube and that tube is pressed into a hole in the brass camera plate.
Comment by jimmymc — July 21, 2010 @ 4:02 pm
Thanks for the reply and thanks again for sharing your knowledge with everyone.
Comment by Dan Sorahan — July 22, 2010 @ 2:02 am
Thanks again for all of the great info. I’ve got something close to working now thanks to all of your help. I’m wondering about the optimal capture resolution of 8mm film. I’ve seen everything on the web from “it’s the same as VHS” to “you need 1080p”. I’ve been using the Stop Motion Animator software and the results look pretty good but the capture resolution is limited to 640 x 480. I’m using the Logitech 9000 which (theoretically) as higher resolutions available. What is the point of diminishing returns? Thanks again.
Comment by Dan Sorahan — October 4, 2010 @ 6:23 pm
The short answer is that 640×480 is just enough for regular 8mm K40, and not quite enough for super 8.
The long answer is to look at the MTF of the film you are using (For my 8mm K40 see this data sheet ), and find the resolution at 20% response. It’s around 60-70 cycles/mm. Let’s use 70 to be conservative. 70 cycles = 140 lines and spaces, so the “pitch” is 1/140 = 0.007mm. Regular 8 frame is 4.37mm wide, so you’d need 4.37×3.28/0.007 = 624×468 pixels to get the whole frame. The return has diminished at this resolution – you don’t get anything more if you go higher. But Super 8 needs a bit more, and a finer grain film would need a bit more. Hence the common use of 1024×768 cameras for 8mm telecine. I’d have used one if I wasn’t so cheap, but since I only do regular 8, I’m not really missing anything. As I said before, the dynamic range of the camera is a much bigger issue!
To convince yourself, examine a really sharp frame of your film under a microscope and compare the finest details with a digital capture of that frame. The finest detail you can see is the film grain itself and with enough resolution it will look the same in the digital frame.
Comment by jimmymc — October 4, 2010 @ 7:38 pm
Just wanted to say thank you again for all of the great documentation you have provided. My system is nowhere near as sophisticiated as yours but it’s up and running, producing results that are way better than the VHS transfers my parents had done in the 90’s. I’ve got about 4,000 feet of 8mm film and as word gets out about my project, the relatives are coming forth with more. I don’t mind though, it’s fun. Some of the film is from 1950, it’s amazing what great shape it’s in! Thanks again.
Comment by Dan Sorahan — October 12, 2010 @ 1:43 pm
Thanks for the update, Dan! I’m delighted for you. I remember the excitement of the first good transfers – it seems like magic. Good luck!
Comment by jimmymc — October 12, 2010 @ 1:54 pm
What is the point to modify webcam to LONG exposure?? I understand when Astrophotographer want to catch a dark deep skye without picture noise, but in telecine the shorter the exposure the better picture, right??
Did you tried unmodified webcam for capturing 8 mm films?
I am using now a Digital Microscope for telecine machine. Only problem is I can not avoid the “pulling down blur” in the picture. Have you noticed the same with unmodified webcam?
Thanks.
Steve
Comment by Steve Varadi — January 26, 2011 @ 5:14 pm
The long exposure mod works by controlling the CCD reset signal. I don’t need long exposures, but I do need to tell when the CCD is exposing (reset signal is not being driven). So I just used the information about the long exposure mod to locate the right pin to connect for the reset signal. I don’t drive reset, I just monitor it.
Shorter exposure is better, of course. I vary the exposure depending on how dark the film is, in order to use the range of the camera to best advantage for each scene.
I don’t have any pulldown blur, since the machine pulls the film to the next frame when the CCD is not exposing. That’s why it’s necessary to connect to the reset signal. The motor is running continuously, but it’s speed is constantly being adjusted to keep the exposure interval away from the pull down.
You’ll have to have some method of synchronizing the camera and the film movement to avoid blur.
Comment by jimmymc — January 27, 2011 @ 8:09 pm
Thank you for the all the information! I’m working on my own telecine project and as others have discovered, the SPC900NC goes for downright ridiculous prices on ebay these days. While there are some cheaper alternatives with the same CCD, most are not easily compatible with Windows 7. I have read that modern CMOS sensors are not all that bad and have decided to give the Microsoft HD-3000 a try instead! Read about my progress below:
http://www.rjnunnally.com/tag/telecine/
Comment by RJ Nunnally — April 4, 2013 @ 10:37 am